How to enable 2FA on Twitter with an Authenticator App
We explain how to use an authentication app to enable two-factor-authentication (2FA) for your Twitter account.
Given the recent news that Twitter is now putting the most popular method of two-factor-authentication -SMS 2FA – behind a paywall, we’ve decided to release this simple tutorial on how to use an authenticator app for Twitter 2FA instead.
While it is dismaying news that SMS 2FA will now only be for paying Twitter subscribers, we can use this as a great time to learn about authenticator apps instead, and turn this negative news into an advantage. If you simply leave your 2FA setting to SMS, it will be automatically disabled, and having no 2FA whatsoever puts your account at risk. It’s time to get to grips with authenticator apps!
First of all…
What is Two Factor Authentication?
2FA. Two Factor Authentication. What is it? We’ll be especially brief because we discuss it elsewhere. Basically, it means having to authenticate yourself twice when logging in. Most of time, one such way is typing in your password. And the other is often typing in a separate code or PIN which is generated as you try and login.
This code can be texted to your phone (which we call SMS 2FA) but of course Twitter is removing that option for free Twitter users. So the other viable option is using an authenticator app.
What is an Authenticator app
Well, as the name suggests, it’s an app. You install an authenticator app on your mobile device (tablet or phone) and then associate it with your Twitter account (you only need to do this once, and we explain how to do it here). Then, every time you login to Twitter from any device, you just need to open the authenticator app on your mobile device and type in the code it shows on the Twitter login page.
It really is that simple.
Like with most 2FA options, you’ll usually only be asked to type in the additional code/PIN when you login from an unrecognised device. So you don’t need to do it every time you login if you use the same device for Twitter.
Sponsored Content. Continued below…
How to install the authenticator app on your mobile device?
For this example we’ll be using one of the most popular authenticator apps on the market – Google Authenticator. There are others, and instructions to each will differ ever so slightly but the overall gist will be the same.
1. The first thing you need to do is install the authenticator app on your mobile device. So you’ll need to go to your device’s app market (e.g. Google Play or Apple App Store) and search for the authenticator app, in this case Google Authenticator. Install the app on your device in the same way you would install any other app.
2. You can associate your Twitter account using either a setup key or a QR Code. Follow one of the two steps below.
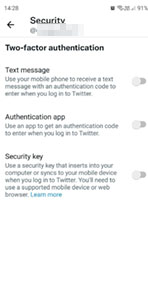
2.1 If you will be using Twitter on your mobile device (the same device you’ve just installed the authenticator app on) then using the setup key is the easiest option. Once you’ve installed the authenticator app, login to your Twitter app and click your profile picture > Settings and Support > Settings and privacy > Security and account access > Security > Two factor authentication and check Authentication app (see image). Click Get started (you may be prompted to enter account password.)
Then select Link app. This will open the authenticator app. Press OK. Your authenticator app will now generate a code but you need to enter this code back in the Twitter app. The code appears on the screen and it will change every 10 seconds. Press and hold on the code to copy it, then go back to the Twitter app and paste it in the confirmation code box (alternatively you can do this manually without copy/paste.)
Once you’ve done that, you’ve successfully associated your Twitter account!
OR…
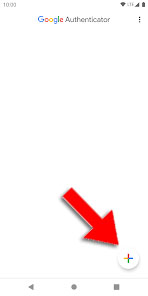
2.2 If you’re using Twitter on a second device (i.e. not the mobile device you’ve installed the authenticator app on) using a QR code is easier. Open the authenticator app you just installed on your mobile device. You’ll see a + icon. Click that icon (see below).
On your second device, login to your Twitter account and go to More (or click your profile picture if using app) > Settings and Support > Settings and privacy > Security and account access > Security > Two factor authentication and check Authentication app. Click Get started (you may be prompted to enter account password.) This will bring up a QR code. If your second device is a mobile device you also have to select Link on another device to bring up the QR code.
On the mobile device with the authenticator app, once you clicked the + icon, select the QR code option, which will bring up your camera. You need to scan the QR code displayed on your second device, and once you’ve done that, you’ve successfully associated your Twitter account!
3. The authenticator app is already to go! When you login from an unrecognised device with your password, you’ll be asked to enter a 2FA code. Just go the authenticator app on your mobile device, open it up, and enter the code it displays (remember this code changes every 10 seconds!)
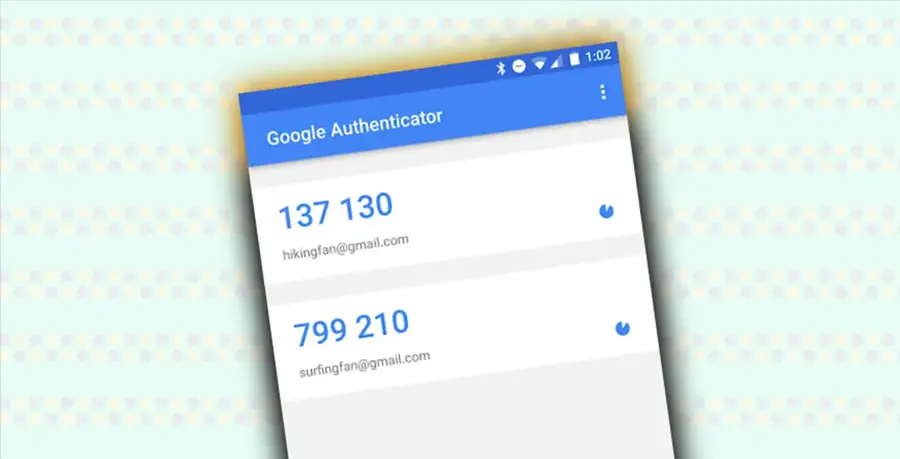
And that’s it! Remember you can use the same authenticator app to secure multiple online accounts – you just need to follow the instructions for whatever online account you’re securing. And all those account’s relevant codes will be shown as soon as you open the authenticator app, and all you need to do is select the one you need and enter it when logging in.
Continued below...
Thanks for reading, we hope this article helped, but before you leave us for greener pastures, please help us out.
We're hoping to be totally ad-free by 2025 - after all, no one likes online adverts, and all they do is get in the way and slow everything down. But of course we still have fees and costs to pay, so please, please consider becoming a Facebook supporter! It costs only 0.99p (~$1.30) a month (you can stop at any time) and ensures we can still keep posting Cybersecurity themed content to help keep our communities safe and scam-free. You can subscribe here
Remember, we're active on social media - so follow us on Facebook, Bluesky, Instagram and X